Showing posts with label foodie. Show all posts

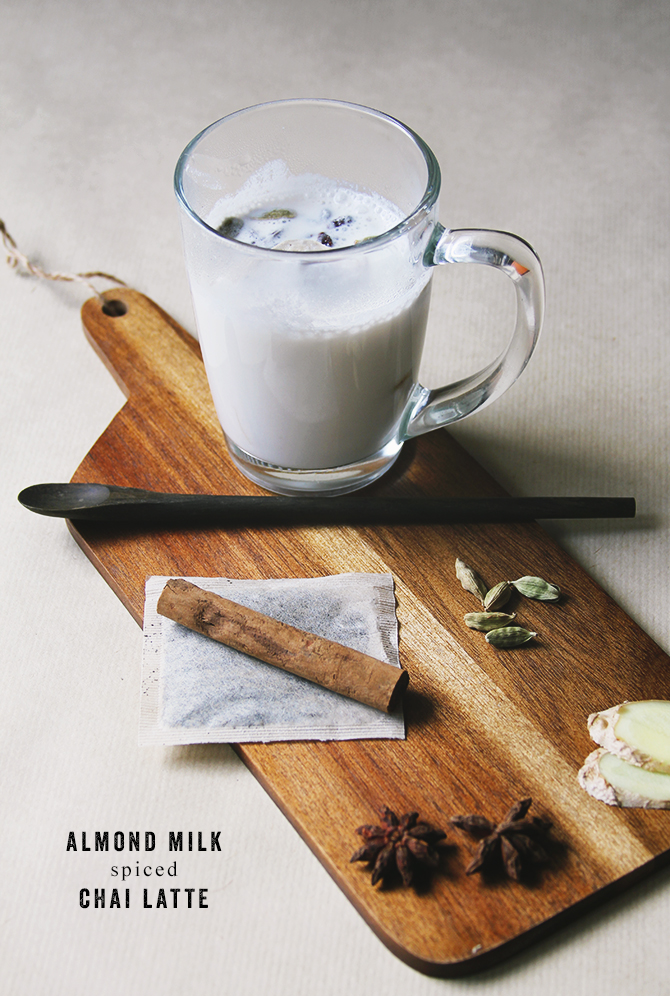
RECIPE | Almond Milk Chai Latte

/

As my exploring the dairy-free life journey continues I have found several recipes that make me forget what I've given up. And this one is so delicious that I'm kind of glad that my decision led me to it. Even when I was drinking cow's milk on a daily basis, I would never put much thought and make something a bit different out of it. And this Chai latte recipe is just something every milk drinker -almond, rice, soya or even cow- should try.    


Needless to say I found it on Love and Lemons blog. They have so many recipes it is hard to just jump to another site. I find everything I need there. But please, if you have to share any cool sites or blogs that will help me get creative with my non-dairy nutrition, I'd looove to know! 

recipe here

RECIPE | Hazelnut Tahini Noodles w/ Beef

/

The big news are that last week I decided to go dairy-free. That's kinda big for me since I basically drunk milk instead of water. Not good at all, I know. Well, during these past few days I've searched maybe hundreds of vegan recipes to get inspired. Of course I still eat meat but it is easier to look for non-dairy recipes like that. And just spice it up by adding some finely sliced beef on top. 

I'm sure most of you already know the Love and Lemons blog. If you don't, please check it out, the recipes are divine. As is this pasta recipe. I'm so glad I tried it. 

You can find the instructions here and then if, like me, you want to add some beef just slice it and roast it for approx. 5mins in order to stay tender and soft.  

After cooking this dish i realized that it's been like forever since I last posted about food here on the blog. So, I had an idea that doesn't require a lot of effort from my end, since I'm really busy at the moment to make new recipes from scratch, and I'll still have the chance to post about food, which I really love. So, since I'm trying to build new, healthier nutrition habits I need to find recipes that not only are appropriate but delicious as well. Basically, I will test recipes found around the internet and then, if I'm satisfied with the result, I will take a photo of my dish and share it with you, linking back to the initial source. Of course I will share little tips to spice it up :)

So, that's all I can do for now. Only easy and fast posts. Better than nothing though, right?
xxx


RECIPE | Roasted Tomato Soup w/ Cilantro Crema

/

Have you heard about RED applications on App store? Well, the basic idea is that  when purchasing a RED application or when buying extra features for existing RED apps in your phone, you help the fight against AIDS. Thoughtful, right? 

While browsing around the app store, like I normally do before bed, I stumbled upon this great cooking app. I have to admit I've downloaded several of them and I always end up deleting them after a couple of months they go unused. But this time it was different. 

Kitchen Stories is a very user friendly app, with a great clean interface that allows you to spend hours reading recipes without getting bored. Of course now that the RED campaign is on, everything is red, but Christmas is around the corner so it kinda fits the mood perfectly!


After this introduction, needless to say that this soup is retrieved from the Kitchen Stories application. When I made it I realized how worth buying this app was - not only for the great cause it serves - but in terms of cooking as well!! I'm telling you, this soup is divine. Highly recommended to serve it on this year's Holiday table. 


Guest Post | RAW ZOODLES by Fab

/

I love raw foods. Living in the UK it’s hard to sustain a raw food diet, so I really like to keep it 70/30 with my raw diet. This is probably my favourite dish, as it also reminds me of my Italian origins. As you may get, I am a big fan of simple girl, who likes to mix it up a bit. Seriously, those balls are heaven. Let me know what you think! Raw Zoodles with Sunflower Seeds Meatballs

Ingredients (serves 4)
4 zucchini
4 vine tomatoes
1 bunch of parsley
2 tbsp extra virgin Olive Oil
200g sunflower seeds (soaked for 6 hours)
50g sun-dried tomatoes
5 olives
1 tsp dried Italian mixed herbs
50g linseeds egg (simply mix linseeds with 2tbsp water and let them sit
for 1 hour)
1 tbsp flaxseed

Instructions
Spiralise your zucchini with a spiraliser (or a mandolin will do!), place them in a bowl and sprinkle them with Himalayan salt, one spoon of extra virgin Olive oil and dried Italian mixed herbs. Let them sit for 30mins. Drain the sunflower seeds, combine them with the tomatoes, olives, ‘lindseed egg’ and flaxseed. Process for 30 seconds, scrape the meatballs from the surfaces and repeat for 2/3 times (I like to add a bit of Italian mix too). 
Create 6/8 small meatballs from the sunflower batter, and let them sit in the fridge for 1/2 hours. Chop the vine tomatoes, add a pinch of Himalayan salt, chop the parsley finely and combine them in a mixing bowl. 
Drain the zucchini (the salt helps releasing water) and add them to the tomato salsa. Top with sunflower seeds meatballs. I suggest you to sprinkle it all with some nutritional yeast. 

________________________________________________________

YOU CAN FIND HER ON:
The Health Bloggers Community
Twitter: @FabGiovanetti
Instagram: @FabGiovanetti

RECIPE | Vegetable Soup

/

So this happened today. The truth is I wasn't expecting my first post after my Eurotrip to be a recipe but I guess people have their weaknesses. First and foremost I wan't to say an enormous THANK YOU to all the kind ladies -and Nathan- who took over my little blog while I was spending some quality time abroad. I am sure you all enjoyed their lovely posts. I, for one, couldn't be more happy with my guest posters :) 

Secondly, I want to show you this soup I made from scratch earlier today! I'm so so excited, it was delicious and extremely easy to make, so I couldn't help myself but sharing it with you on the spot. I'm not entirely sure the photo illustrates the deliciousness but guuuuuuuuys if you are at any level soup persons you will love this one. 

INGREDIENTS (serves two)
4 medium sized tomatoes
4 carrots
a stalk of celery
one handful of broccoli
truffle oil and/or flavored salt
regular salt and freshly ground pepper
pink peppercorn for styling


INSTRUCTIONS
You will either need a steamer or an oven. If you prefer using the oven, preheat it to 200C and add the vegetables, roughly chopped on the top rack. Cook until there are soft. In the steamer case, add the vegetables on the lower level and cook for about 25'. The main difference between these ways is that the soup will have a more roasted flavor in the case of the oven. It's up to your liking though!

Meanwhile, bring 5 cups of water to boil and dilute the salt and pepper in it. If you have truffle salt don't use it now. Just the regular salt. When the veggies are ready add them in the mixer and beat them. Gradually add the water. Do that until the soup looks smooth. 

The last step depends again on your taste. In case you're hosting a dinner party and want to serve this soup as an appetizer I recommend you to follow it, but if you're just making it for yourself it's not that important. Since the soup has no potatoes nor cream in it, it won't be completely smooth. Therefore, in order to make it more appealing in the eye and better in terms of texture, I suggest you to strain it. I repeat it's not necessary. 

After serving, add some truffle oil and salt on top of it, along with some pink peppercorn, which besides giving a nice touch of pinkish red on the dish, it adds something unique to the soup as well! 

Enjoy !


Guest Post | My Paradissi

/
Hello My Lifebox readers! This is Eleni, blogger behind My Paradissi and I’m here to fill up for sweet Anna-Rosa while she’s enjoying some well deserved time off. I know Anna-Rosa is a dearest fan of cooking (like, please, how delicious does this salad look?) so I thought I’d prepare for you a post that combines both the culinary essences of smell and taste with the visual one a decent interior designer and architect (hello Anna-Rosa) swears by. That means delicious recipes prepared in equally astonishing kitchens that, of course, get along perfectly in style and vibe. Like fresh vegetables and sleek surfaces, creamy cheese and whitewashed spaces, crisped bread and unrefined woods. Does it make any sense to you? I feel that the surroundings play a vital role for ones health and inspiration. Yes, no junk food is allowed in the above kitchens ;)

If you are indeed inspired and crave for some healthy delicacies, you can find the links to the recipes here:


You can always drop by My Paradissi to say hi :) Thanks Anna-Rosa for having me!

Image credits:
1 / 2 / 3 / 4


Recipe | Homemade Hot Chocolate

/
recipe partly adapted from here | illustration made by me

As you can see I'm totally diving into fall. The other day I showed you my go-to fall outfit and now I'm here to share with you my go-to fall beverage recipe. I don't know about you but when it comes to cold days there is no other drinks but hot chocolates and coffees in my mind. And the combination of those two as well. But let's not run ahead so quickly. 

So, here it is, the best and easiest homemade hot chocolate recipe you will ever find. And because the credits are not mine to take, it is adapted from the one and only Martha Stewart and found here. After trying it a million times though I'm absolutely positive that I like it more when the cocoa and sugar proportions are equal, instead of sugar being almost 50% more than the cocoa proportion. However it is totally up to you and your sweet tooth. 

The cool thing with this recipe is that you make the cocoa mixture and save it for as long as you want. And when it's time to serve a delicious cup of hot chocolate you only need a cup of milk to warm! How amazing is that?


When it comes to serving, I love to add some chocolate sprinkles on top of it or some whipped cream as well. Yummy yummy :) So mouth watering.. 

And because, as I already told you, this is my go-to beverage recipe during fall and winter I designed a mug especially for it!! I thought it would be super cute to have a nice mug reminding me of my favorite drink every time I open my kitchen cabinet. Plus, we all have our favorite coffee mug, right? Why not having a favorite custom hot chocolate mug as well? hehe, I love it !

And if you are into customizing mugs too, not only by adding favorite recipes, but also by adding photos or cute quotes on them, check out the lovely TINY PRINTS shop. You will find dozens of designs and I'm sure you'll have a blast designing your own mug. I sure did! And if you make one yourself I'd love to see your creation. 


recipe | nectarine popsicles

/


Today's recipe is extremely easy but too refreshing, delicious and healthy that's so worth it. When it comes to sweets I'm a total fruit sucker. And even more when it comes to fruity popsicles. Ever since I was a little girl I preferred fruity ice screams and popsicles instead of chocolate-cream, classic ice creams. 

Last month I went for an IKEA walk. Just window shopping. But I stumbled upon some cute popsicle molds and I couldn't resist. So here I am sharing my go-to fruity summer sweet recipe that is perfect to satisfy my cravings without worrying about calories.


You will only need a fruit juicer and...popsicle molds. That's it. Just pick your favorite fruit, or combine fruits, take their juice and freeze them!! I love nectarines very much so I didn't mix the flavors. And because I really wanted to go for healthy this time I didn't add sugar or any sweeteners. BUT I always share a couple of extra ideas that you could use to adjust the recipe to your taste. Feel free to add 1tsp. of caster sugar in each mold if you want your popsicle sweeter OR if you use fruits that are sour, like oranges. And another great idea would be to add little chopped fruit pieces in the molds :) enjoy!

recipe | blueberries & blue cheese salad

/

I think it is safe to say that I'm a salad maniac. My boyfriend sure does call me like that and I don't blame him at all. But many people just don't get how awesome salads are. And sooo easy and quick to make. If only groceries lasted longer so I could buy tones of them and have a vegetable-full fridge all the time. 

So, this time the key to this salad is the blueberries and blue cheese combination. The rest of it are just minor details. I used a pretty ordinary lettuce base, added some grated carrot and a handful of cherry tomatoes -because I just add them in every single salad like a maniac. Don't panic with the ingredients though. Just use whatever salad stuff you have in your fridge. And then add the killing combination.
And I'm just saying guys, you should try it! And it goes really good with a balsamic-honey vinegar, some fresh ground pepper and salt. 

Try it and you'll see what I mean :)

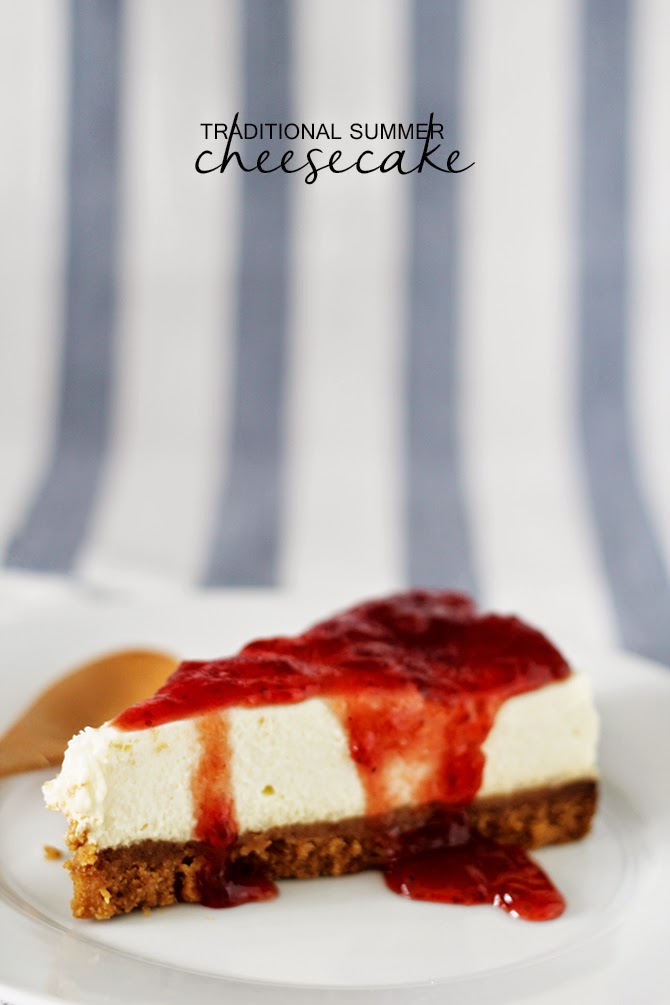
recipe | Summer Cheesecake

/
How about starting our week with a fresh and delicious recipe? 
I don't know about you but during summer I love my desserts fruity and light. And this cheesecake combines all that, plus it is great cause it's served right from the fridge!! You can save it in it for more than a week (if you manage not to consume it right away) and it makes a great dessert to satisfy your sweet-toothed guests as well! Personally, I had to make it because I lost a bet that I wasn't supposed to lose BUT believe me it is totally worth it and you will love it!! And who doesn't want a cheesecake recipe in his archive, right? I have probably quite a few written down and this one is by far the best I've tried. 
INGREDIETNS
base
450gr digestive biscuits
200gr butter
cream
300gr Philadelphia cream-cheese
200gr Mascarpone cream-cheese
400ml dairy cream
1 cup caster sugar

INSTRUCTIONS
Preheat your oven to 180C. Prepare a round cake pan (mine is 27cm wide). Add a metallic mixing bowl in the cooler (this will help you with the dairy cream).

Crush the biscuits either using a pestle or a food processor. Melt the butter, pour it in the crumbed biscuits and mix until fully combined, so that you have a biscuit paste. Add the paste in the pan and spread it all over it so that it forms a nice straight thick base. Bake for about 10-12' and then let it cool completely.

Remove the metallic mixing bowl from the cooler. Pour in it the dairy cream and start beating with your mixer. If you don't have an electric one, it's fine, you'll just need to be a bit patient. When the cream starts to bubble add gradually the caster sugar. Beat until you have a fluffy foam. Add the philadelphia and mascarpone cheese and combine really carefully and slowly so that the whipped cream doesn't lose a lot of volume. When the mixture is fully combined add it on top of the biscuit base. Leave it in the fridge to cool for at least 4 hours before serving. 

> serve it with your favorite jam or chopped fruit! I used my favorite Bonne Maman strawberry jam <
Enjoy!!! 

Recipe | Ginger & Molasses Cake

/
Even though I'm not a sweet tooth person I easily enjoy a nice slice of a slightly spicy cake. I found this recipe while searching where to use creatively some ginger left from the other day and I'm sooo glad I did. Maybe one of the most interesting flavors I've ever tasted, when it comes to sweets. The ginger combined with the molasses make the cake exactly as sweet as needed and it is perfect with a cup of coffee in the morning!


INGREDIENTS
4 ounces fresh ginger
1 cup mild molasses
1 cup brown sugar
1 cup peanut oil
2 1/2 cups flour
1 tsp ground cinnamon
1 tsp ground cloves
1 tsp ground black pepper
1 cup water
2 tsp baking soda
2 eggs, room temp.

INSTRUCTIONS
Position the oven rack in the center of the oven. Preheat the oven to 350F/180C. Line a round springform cake pan with a circle of parchment paper. 
Peel, slice, and chop the ginger very fine with a knife (or use a grater). Mix together the molasses, sugar, and oil. In another bowl, sift together the flour, cinnamon, cloves and black pepper.
Bring the water to the boil in a saucepan, stir in the baking soda, and then mix the hot water into the molasses mixture. Stir in the ginger.
Gradually whisk the dry ingredients into the batter. Add the eggs, and continue mixing until everything is thoroughly combined. Pour the batter into the prepared cake pan and bake for about 40', until the top of the cake springs back lightly when pressed or a toothpick inserted into the center comes out clean. If the top of the cake browns too quickly before the cake is done, drape a piece of foil over it and continue baking.
Cool the cake for at least 30 minutes. Run a knife around the edge of the cake to loosen it from the pan. Remove the cake from the pan and peel off the parchment paper.

Recipe adapted from here.

Recipe | Roasted Chicken

/


The perfect moist and tender chicken has always been an issue for many of us, i know. The truth is I've tried quite a lot of recipes that ensured that the chicken will not dry while cooking. BUT I have to admit after a long long research I did find the simplest and yet most effective way to make your chicken just...perfect! Don't overcook it!! Ok, it's not thaaaat simple not to overcook it but that's the key. Plus some really nice seasoning, olive oil and lemon. That's it! 


First of all, preheat your over to 400F / 200C. Drizzle the chicken with some olive oil and then season it, on both sides, with some salt and pepper. I bought some herb salt from Istanbul last month so I used this but you can use plain salt as well! Squeeze half a lemon on each piece of chicken, either you prefer boneless breasts or legs, and leave the lemon cups in the baking sheet. 
Roast your chicken for 12 mins and then crank up the oven temp to 475F / 250C. Roast for another 15mins, depending on the size of your chicken breasts or legs. The goal is the skin to become golden brown and the lemon juices in the pan to start bubbling and become dark brown. 


Let the chicken cool for 10' and serve it on top of salad leaves dressed with lemon and olive oil!! 
Enjoy ;)

recipe

/

If you've been following for awhile you much have noticed that I love salads. This one is clearly adapted from Jamie Oliver and his amazing "30 minute meals" episodes. However it is one of my favorite go-to recipes and now that summer is here (or almost here) it is a good opportunity to share it with you. So if you are a sucker for salads and especially for colorful cherry tomatoes, this recipe will totally make it to your lunch table.


The ingredients are pretty few and the instructions simple to death ;) And if you like being messy when cooking, like Jamie, this salad is great for using your fingers to mix it!! Enjoy!


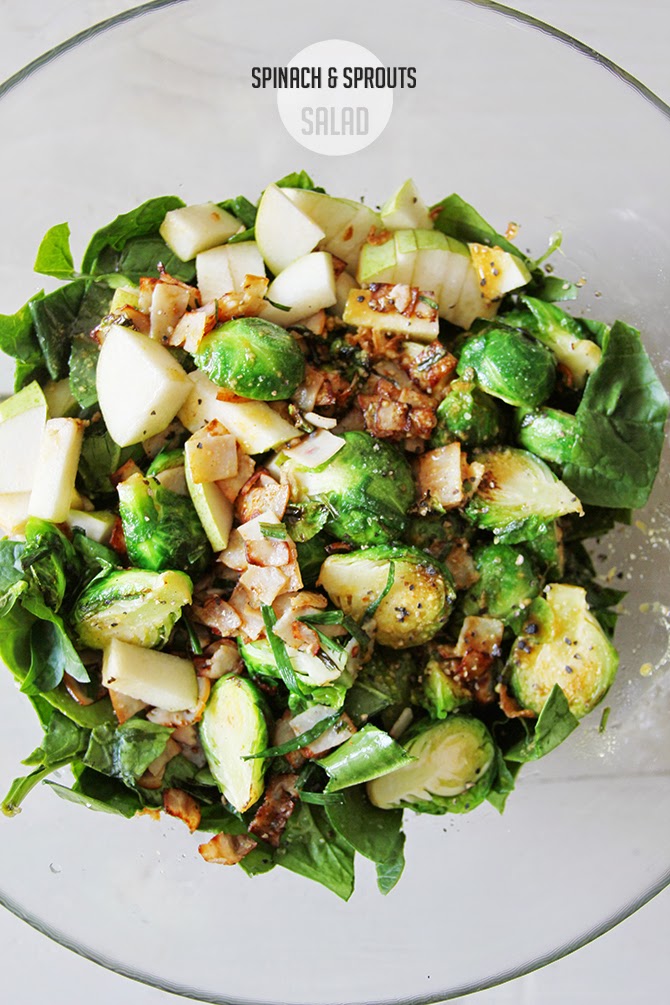
recipe | spinach & brussel sprouts salad

/

Oh my, I love salads. Especially in the summertime. Not only they are healthy and nutritious, but they are delicious too. I think that most people haven't realized how a great meal a salad can make. Seriously! They think that salads are side-food. On the contrary!! Of course it depends on the ingredients, but salads can definitely be great for light and fresh summer lunches ;)
Anyway, the one I'm sharing today is not that summery but it is absolutely delicious. A nice tricky way to make a salad a main dish is to combine raw vegetables with cooked ones. And of course with some meat too. You know, just enough to convince those who don't like salads. This one doesn't have as a main ingredient meat but it is pretty filling, believe me. So...

Ingredients
| spinach leaves | brussel sprouts | leek | spring onions | pear | smokes turkey slices
| balsamic vinegar / mustard / honey | virgin olive oil | freshly ground pepper / salt

How to make it
| 1 finely chop the leek and spring onions | 2 cut the brussel sprouts in half | 3 cut the turkey in small cubes | 4 add some oil in a medium sized skillet | 5 add the sprouts | 6 add the leek and onions and after one min. add the turkey as well | 7 add the spinach leaves and pieces of pear in a large salad bowl | 8 mix a tbsp of honey with a tbsp of mustard and two tbsp of vinegar. When completely incorporated add two-three tbsp of olive oil and mix again until fully combined | 9 add the cooked ingredients in the salad bowl, mix together and add the vinegar sauce | 10 add some pepper and salt, mix once more and ready


DIY | my Easter box

/

As I said yesterday, this year I didn't dye eggs, as I usually do! However, on Sunday I'm invited to go to my best friend's house for lunch, and although she asked me to bring a potato salad I traditionally make, I thought it would be nice to give her something eastery too. 
So I decided to make a small easter box for her! HA!

If you want to make them yourself, it's pretty easy. I just boiled the eggs and let them cool! Then I spray painted them and put them in an egg holder, also spray painted! Please note that these eggs are for decoration only!! But who doesn't want to add some gold in his life...and house? Then you will only need a nice ribbon to make a bow :) And TaDaaaa!!
Easy right? And I think it makes a great Easter gift!


Recipe | Fluffy Pancakes

/
One of the best ways to say good morning is...to make breakfast to your loved one, right?? So, since I've been crashing at my friends place these last couple of weeks, I thought it would be a good idea to surprise her and her boyfriend with pancakes yesterday morning! You know, as a yummy thank you for letting me stay at her house :) 

I searched over the internet to find a nice recipe to follow and I think I actually found the best one. But since I'm always some kind of a rebel when it comes to cooking I didn't follow the instructions per se. The pancakes turned out really fluffy and delicious, so if you are a pancake kind of person write this one down, you will love it!! (recipe adapted from here with a few changes)


You'll need // makes 8 medium sized pancakes
1 1/2 cup of milk
2 tbsp white vinegar
2 cups of all-purpose flour
2 tbsp white sugar 
2 tsp baking powder & 1 tsp baking soda
1 tsp salt
1 egg
2 tbsp melted butter

How to //
_ combine milk with vinegar in a bowl and set aside. 
_ combine flour, sugar, baking powder, soda and salt in a large mixing bowl
_ add egg and butter in the soured milk bowl and whisk
_ pour the wet ingredients into the the flour mixture and whisk until smooth
_ heat a large skillet over medium heat and coat with butter
_ pour 1/4 cup of batter in onto the skillet and cook until bubbles appear on the surface
_ flip and cook until brown on the other side too 

enjoy!

Recipe | Love Chocolate on a Stick

/
Apparently I missed my kitchen more than I thought, so I decided to make something easy and fun to share. Most DIY blogs have already posted a couple of Valentine projects. However, I've never been a valentines-day lover and I actually surprised myself when I had the idea to make Love Chocolates. It's funny to call them Love Chocolates, I think it's kinda cute! But the truth is that the only thing that makes them "love" ones, is their shape, which easily could have been different! In any case, I love my heart shaped molds and I think it will be perfect to make these little treats for your Valentine, in any shape you want! 

You will need // [12 sticks]
-molds (heart shaped or just regular ice-cube molds)
-sticks (mine are from Starbucks...ooopsie!)
-500 gr couverture chocolate
-3 tbsp cream or a stick of butter
-silly, funny, cute and colorful toppings
-and if you are a bit dashing...sprinkle the bites with some sea salt!! (heavenly!!)

How to //
-melt the couverture 
-add the cream or butter and remove from heat
-poor the chocolate into the molds and let cool
-add a stick to each chocolate
-sprinkle and decorate with colorful and happy toppings
*consume* :)

Happy Pre-Valentines Month!!! 

Happy Holidays!

/


Merry Christmas y'all!! The last few days have been hectic so I didn't have the chance to post anything around here. I do miss you all though and I hope you are having the best Christmas time ever. I sure do!
Even though I didn't do anything extraordinary, I threw a small dinner Christmas Eve party and everything was lovely. You can see some photos above, but unfortunately I didn't take many since I had too much fun to bother :) Anyway, you can still get the vibe, right? So things have been pretty Christmassy around here! What was your Christmas Eve like? Did you do anything special?

On other news, I gave a small interview on IamTheLab about my jewelry line. You can read it here :) 

Foodie Weekend Round-Up

/
hello hello my lovely friends. I know i've been a bit off lately, but many things are going on and my head has been all over the place! the good news are that my sister in law delivered her baby and now I have a teeny tiny niece to love as well!! That means I'm in Athens again, since I want to be with my family more than ever, to embrace our little's life. Moving to Athens for the month though made my life messier than ever. I had to bring all the stuff I need for my jewelry with me plus clothes, books and many more things I use on a daily basis. Anyway, the important thing is I get to be with my friends and family and I really love that.
So, the point of me saying all these is that I don't have enough time to spend on cooking, DIYing and photo shooting. Therefore I chose to share with you my favorite food blogs. Because, even though I try to cook and then have the courage to share my recipes with you, I hardly consider my blog a food one. I just like to share with you my cooking experiences :) On the contrary, the blogs I introduce you to today, are really good food blogs. And I really admire the people behind them. Please take a look yourself to be convinced!


Happy Weekend :) See you on Monday!


Recipe | Beetroot Bites

/

I was looking for a Christmas recipe to share but, not something difficult and demanding. I just wanted something to look a bit christmassy. And these cute beetroot bites are just that! Red, white and green, the dominant Christmas colors all in one little bite. I have to admit that the idea came to me after seeing this recipe on Fork and Flower blog. I loved the idea of making a wintery caprese salad so I tried to make one too, with different ingredients. Scarlett's salad was sweeter in some kind of way, but mine is a bit sour.
I love it cause it can be served as an appetizer, it looks amazing and has a great taste as well!

if you want to make these cute little bites, you will need only a few ingredients. Basically, beetroots, yogurt and capers. Firstly, you will have to cook the beetroots. Many super-markets sell pre-cooked beetroots but you can do whatever works best for you. After cooking them, let them cool for a while and then slice the them horizontally. Arrange the slices on a plate. Then you will have to add some yogurt on top of every slice. I chose to use a pastry bag, to make it look more festive! of course you can just use a spoon if you want. Garnish with a handful of capers and then drizzle over some olive oil and maybe some balsamic vinegar if you like it. Ready to serve!!


Projects you might also like

Instagram